Entra ID (Azure AD) Join
Using Provisioning Packages (PPKG) for Entra ID migration
Migrating a local or domain profile to a Microsoft Entra ID (formerly Azure AD) joined identity requires you create a Windows Provisioning Packages (.ppkg).
The Challenge
Standard tools cannot simply "join" Entra ID via a command line API in the same way they join an on-premise domain. The official Microsoft method for automated joining is applying a Provisioning Package.
Workflow
- Create PPKG: Use Windows Configuration Designer to create a package that joins Entra ID.
- Configure Job: In the web portal, create a Job and select "Entra ID" mode.
- Run Migration: Profmage migrates the profile to the future Entra ID user (even if they haven't logged in yet).
- Apply PPKG: At the end of migration, Profmage applies the PPKG, which triggers the join.
- User Login: The user logs in with their M365 email/password. Windows connects to Entra ID, creates the profile, and Profmage (via AppX repair) ensures their old data is waiting for them.
If the migration is interrupted, the domain is temporarily unreachable, or antivirus stops the client, rerun the same Job ID. Profmage will resume from the last completed step.
Creating the PPKG
In order for Profmage to join the computer to Entra ID automatically, we'll need to create a provisioning package. This can be done using the Windows Configuration Designer (WCD) which can be installed from the Microsoft Store here.
-
Open WCD and select Provision desktop devices.
-
Name your project something along the lines of "Customer-EntraID".
-
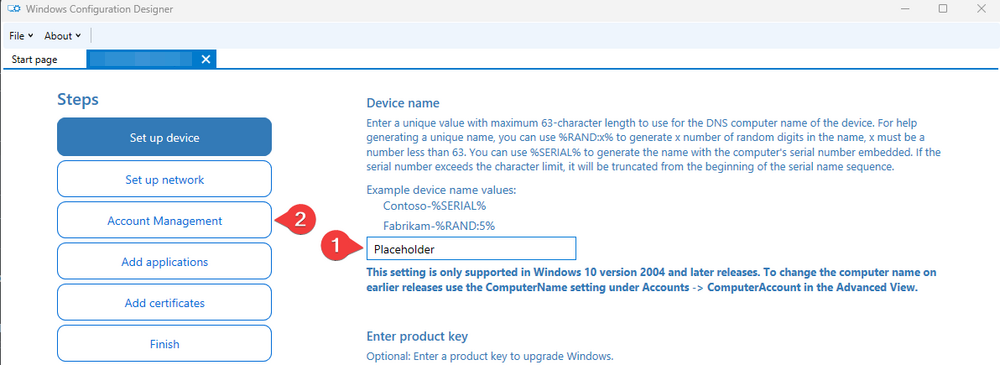
Specify "Placeholder" for the computer name then skip to the Account Management section (name is required and will be removed later).
-
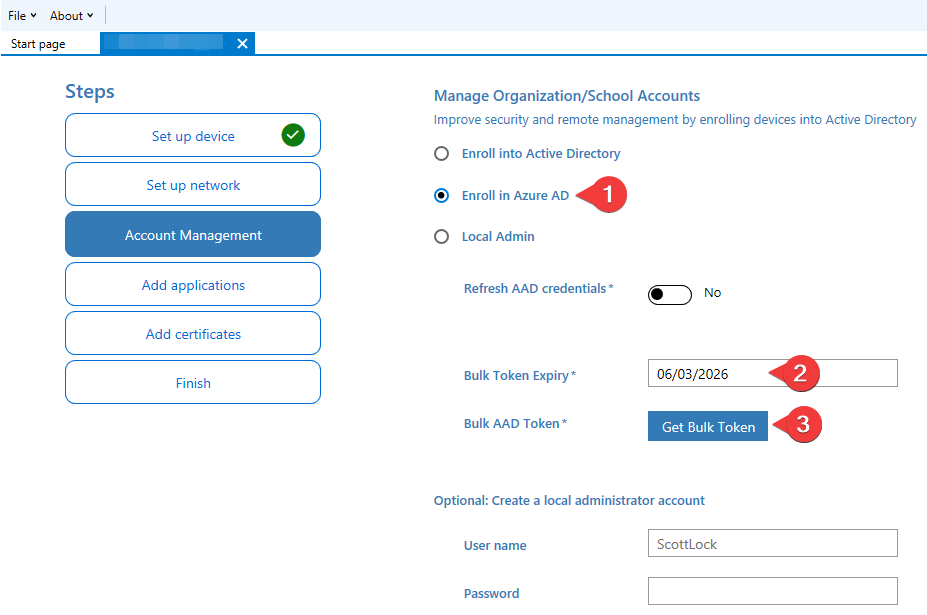
Specify your token expiration date and auth with the customer's tenant admin using the Get Bulk Token button.
-
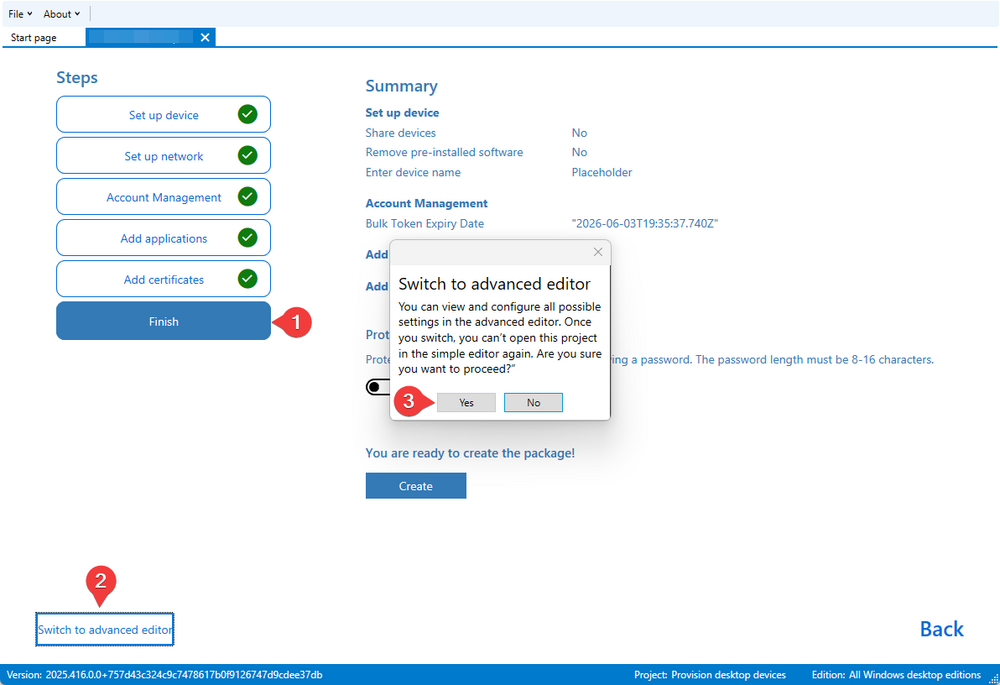
Once you have your token skip to Finish, do not hit create, hit Switch to advanced editor button in the bottom left.
-
In the advanced editor select the DevDetail > DNSComputerName customization on the right side of the window then hit Remove.

This will remove the computer name from the package. The only customization required is the Accounts, which should contain your bulk enrollment token:

-
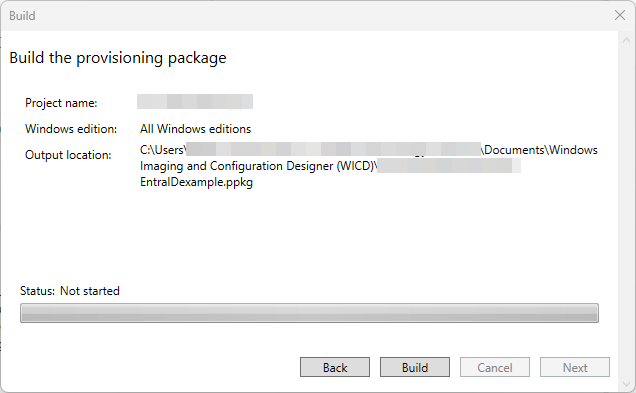
If your package has the BPRT, you are good to export it. Select Export > Provisioning package. Do not encrypt or sign the package. Your final build window should look something like this:
-
Hit Build, then go grab your
.ppkgfrom the output folder. Ensure that you follow the Entra ID/Intune configuration steps below to make sure the package works!
Once you have your .ppkg file, you can upload it to your cloud configuration in the Profmage portal.
Note that when a package is created, a service account is generated in the customer's tenant named package_{GUID}. This account's credentials are used to auth into the tenant to join Entra/Intune. More details on this in the tenant config section.
Tenant Configuration
In order for Profmage to successfully join machines to Entra and Intune, we'll need to update a few settings in the customer's tenant.
-
Login under the customer's 365 admin.
-
Disable the MFA requirement for enrolling devices to Entra
entra.microsoft.com-> Entra ID -> Devices -> Device settings -> Require Multifactor Authentication to register or join devices with Microsoft Entra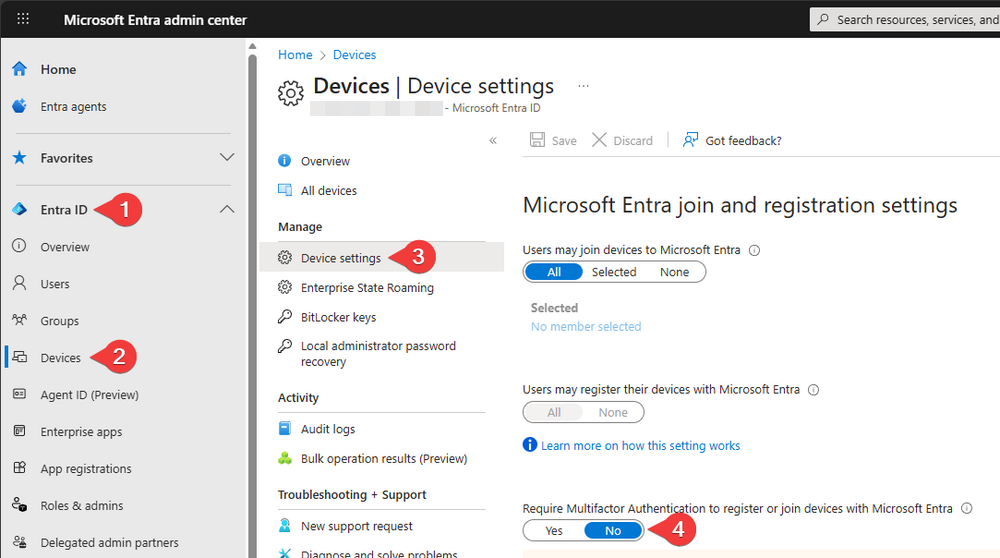
-
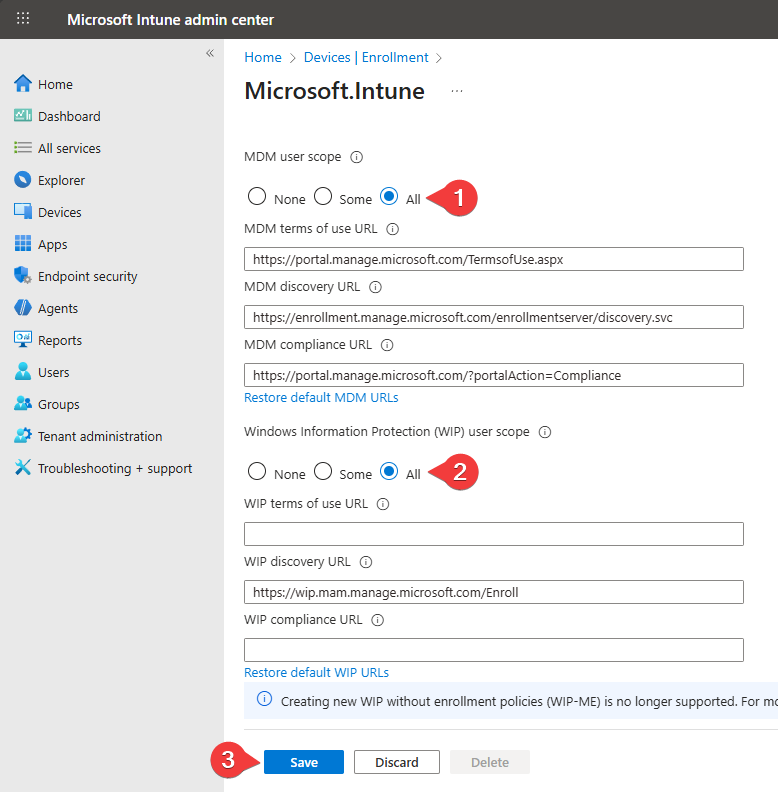
Ensure that automatic Intune enrollment is enabled
intune.microsoft.com-> Devices -> Device onboarding -> Enrollment -> Automatic Enrollment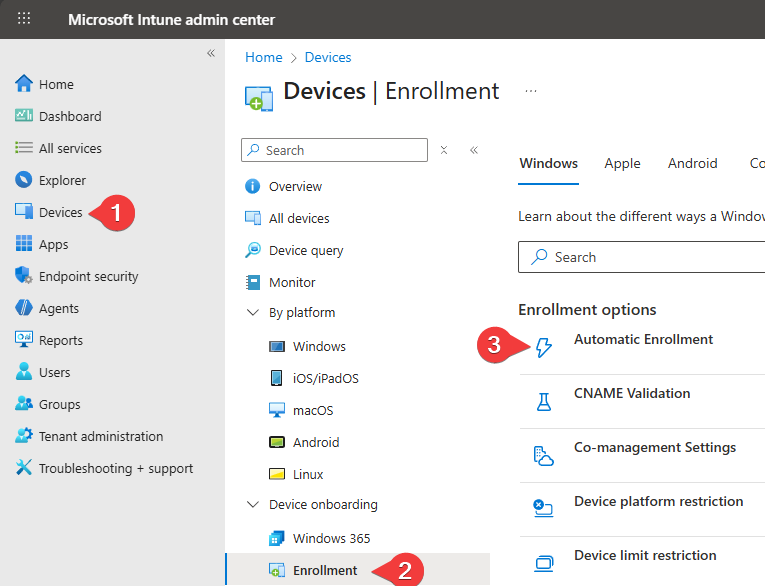
-
Set per-user MFA to disabled for your
package_<guid>accountentra.microsoft.com-> Entra ID -> Multifactor authentication -> Searchpackage_-> Check box -> Disable MFA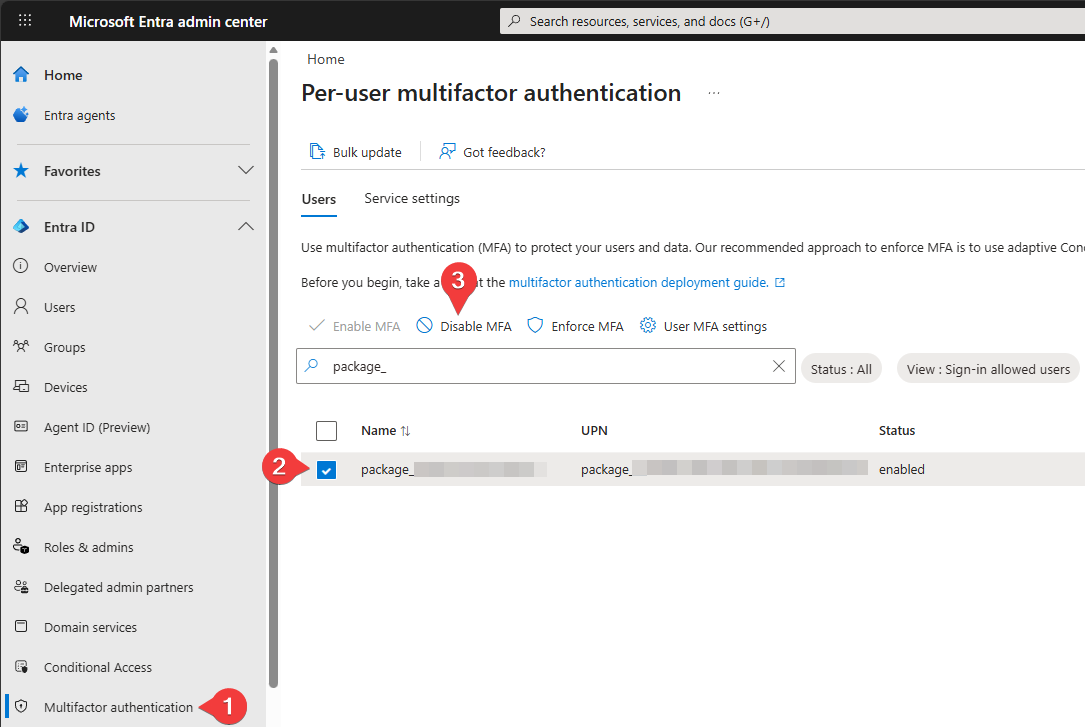
-
Ensure your
package_<guid>account is excluded from any conditional policies enforcing MFA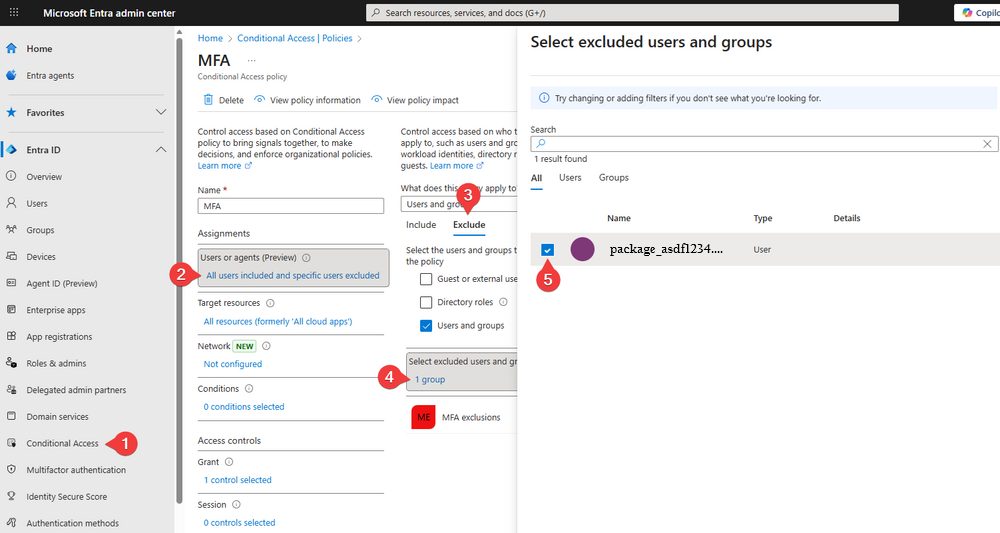
Exporting Entra ID Users
When setting up Cloud Configurations for an Entra ID migration, you will need the Object IDs and User Principal Names (UPN) of the target users for accurate mapping.
We provide a PowerShell script to automate this export process directly from the customer's tenant.
-
Download our Entra ID Export Script.
-
Open PowerShell and run the script:
.\Export-EntraIDUsers.ps1 -
Sign In: Follow the prompts to authenticate with a Microsoft Graph-authorized account (requires User Read permissions).
-
Review Output: The script generates a file named
EntraIDExport.json. This data is used to populate your user mappings in the Profmage portal.
The script automatically checks for and installs the necessary Microsoft Graph PowerShell modules if they are missing.
Conclusion
By using Provisioning Packages, Profmage enables a fully automated transition to Microsoft Entra ID.
Once you have verified your tenant configurations and built your .ppkg, you are ready to begin migrating users to Entra ID.
For large-scale deployments, always perform a pilot test on a small group of devices to ensure all conditional access and enrollment policies are correctly configured.